How to Escape Mount: Complete Guide for All Levels
Last Updated: January 2026
Quick Summary: Getting stuck under mount is one of the most frustrating (and dangerous) positions in BJJ. This guide breaks down the essential mount escapes every practitioner needs, from fundamental techniques for white belts to advanced options for seasoned grapplers.
---
Key Takeaways
- The trap and roll (upa) is the highest-percentage mount escape and should be your first option
- Successful mount escapes require proper timing—escape during transitions, not when your opponent is settled
- Elbow-knee escapes work best when combined with hip movement and frames
- Staying calm and protecting your neck is more important than escaping quickly
- Most mount escapes fail because of poor bridge mechanics, not technique knowledge
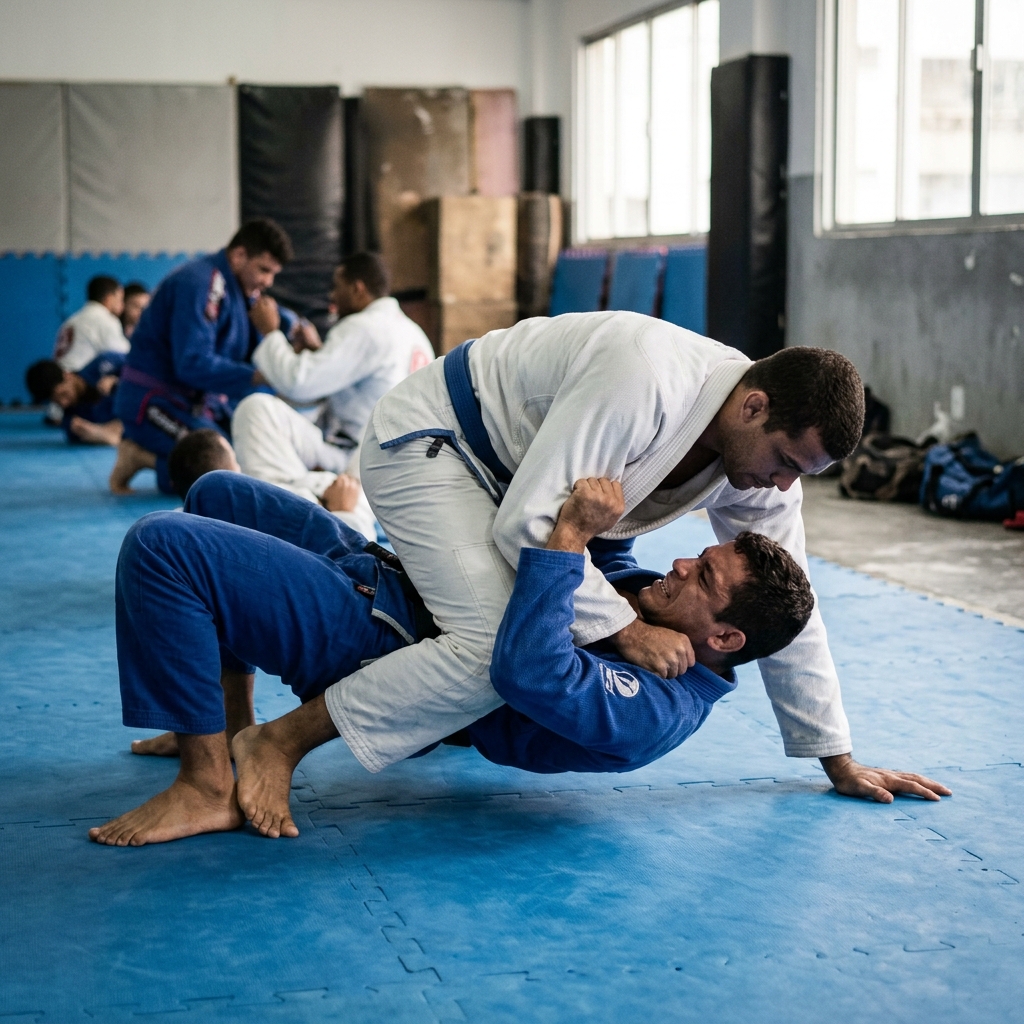
What Is the Mount Position?
The mount is a dominant ground position where one person sits on top of their opponent's torso, with knees positioned on either side of the body. In BJJ, achieving mount scores 4 points, and for good reason—it's one of the most controlling positions in grappling.
In BJJ terms: Mount gives the top person gravity, leverage, and access to numerous submissions while severely limiting the bottom person's options.
Why it matters: If you can't escape mount, you become vulnerable to submissions (armbar, mounted triangle, ezekiel choke, americana) and strikes in MMA or self-defense situations. Learning reliable mount escapes is essential for your BJJ development and personal safety.
> For Beginners: Think of mount like someone sitting on your chest—all their weight pins you down, and they have both hands free while yours are occupied defending. Your goal is to create enough space and leverage to reverse the position or return to guard.
---
When to Attempt Mount Escapes
The best mount escapes happen before your opponent settles their weight. Timing is crucial.
Best opportunities:
- The moment they transition to mount (before establishing control)
- When they reach for a submission (their base shifts)
- When they post a hand on the ground (one less control point)
- After successfully blocking a submission attempt
- Your opponent has grapevines in (address this first)
- They have a deep grip on your collar (defend the choke first)
- You're completely gassed—focus on survival and breathing first
- They're fully settled with low hips and good posture
Essential Mount Escapes
Escape #1: Trap and Roll (Upa)
The trap and roll is the fundamental mount escape every BJJ practitioner learns first. It's effective at all levels because it uses leverage and momentum rather than strength.
Starting Position: You're flat on your back, opponent in mount.
#### Step-by-Step Breakdown
1. Protect Your Neck - Tuck your chin and keep your elbows tight - If they have collar grips, address these before escaping - Tip: Don't panic—rushed escapes get you submitted
2. Trap One Arm - Grab their wrist (same side you'll bridge toward) - Pull their arm across your centerline - Watch out for: Them pulling the arm free—maintain strong grip
3. Trap the Same-Side Foot - Hook your foot over their ankle - Your foot goes OVER their foot, pinning it to the mat - Tip: No foot trap = they simply post and stop your bridge
4. Bridge Explosively - Drive through your heels - Aim your hips UP and OVER your shoulder (45-degree angle) - Your hip should go where their trapped hand is - Tip: Bridge to the corner, not straight up
5. Follow Through - As they tip, continue rolling - End in their guard (not mount—watch for sweeps)
6. Establish Position - Posture up immediately - Begin guard passing sequence
#### Common Mistakes
Mistake #1: Bridging Straight Up
The Problem: Your opponent simply settles back down, having lost nothing.
The Fix: Bridge at a 45-degree angle toward the trapped arm side. Think about putting your hip where their hand is pinned.
Why this matters: Straight up doesn't create momentum—diagonal bridging tips their base and makes the reversal possible.
---
Mistake #2: Forgetting the Foot Trap
The Problem: They post their foot and block your bridge entirely.
The Fix: Before bridging, ensure your foot is hooked OVER their ankle, pinning it to the mat. No foot trap, no escape.
Why this matters: The foot trap is what makes this technique work. Without it, even a perfect bridge fails.
---
Mistake #3: Weak Bridge
The Problem: You elevate slightly but lack the power to tip them over.
The Fix: Drive through your HEELS, not your toes. Use your legs like you're deadlifting. Explode don't push.
---
Escape #2: Elbow-Knee Escape (Shrimp Escape)
When trap and roll isn't available, the elbow-knee escape offers a technical alternative that works even against larger opponents.
Starting Position: Flat on back, opponent in mount (especially effective when they're higher on your chest).
#### Step-by-Step Breakdown
1. Frame on Their Hips - Place both hands on their hips (palms facing them) - Keep elbows tight to your body - Tip: Frames create space—you need space to hip escape
2. Turn to One Side - You're not escaping straight back—you're escaping laterally - Choose the side where you have more space - Watch out for: Exposing your back—keep shoulders somewhat square
3. Hip Escape (Shrimp) - Push off your far foot - Drive your hips AWAY from them laterally - Your goal: get your knee to where your elbow was
4. Get Your Knee In - As your hips create space, shoot your knee into the gap - Your knee should go between you and their hip - Tip: Keep your knee pointing up, not flat
5. Full Guard Recovery - Once one leg is in, follow with the second - Work to closed guard or open guard position
6. Re-establish Guard - Close your guard or establish grips - You've successfully escaped
#### Common Mistakes
Mistake #1: Not Actually Hip Escaping
The Problem: You turn but don't create distance—your knee can't fit in the gap.
The Fix: Focus on driving your hips AWAY. The escape requires movement, not just rotation.
Mistake #2: Letting Them Flatten You
The Problem: You start to escape but they settle their weight and kill your hip movement.
The Fix: Stay on your side as much as possible during the escape. Getting flat again resets their control.
---
Escape #3: Heel Drag Escape
A technical variation that works when you can't get the full elbow-knee escape.
#### Step-by-Step Breakdown
1. Frame on Their Hips - Same starting position as elbow-knee
2. Hip Escape to Create Space - Shrimp away to get your hips lower than theirs
3. Hook Their Ankle - With your same-side foot, hook behind their heel - Your heel hooks their heel
4. Drag Their Foot Over - Pull their foot across your body using the hook - This creates space for your knee to enter
5. Recover Half Guard - As their leg crosses, trap it with yours - Establish half guard position
6. Work to Full Guard or Sweep - From half guard, continue your escape or attack
---
Drills to Improve Your Mount Escapes
Practice these drills to build muscle memory and improve execution:
Drill 1: Solo Bridge Drill
Reps: 20-30 per session Focus: Explosive bridge mechanics
1. Lie on your back, feet flat, knees up 2. Bridge UP and OVER your shoulder (45 degrees) 3. Hold the top position for 1 second 4. Lower with control 5. Alternate sides
Key detail: Your hips should leave the mat entirely at the peak.
---
Drill 2: Solo Shrimp Drill
Reps: Down and back across the mat (3-5 sets) Focus: Hip movement and lateral escape
1. Start on your back 2. Turn to one side and shrimp (drive hips away) 3. Return to back, turn to other side, shrimp 4. Continue down the mat
Key detail: You should be moving laterally, not just wiggling.
---
Drill 3: Partner Mount Escape Flow
Reps: 5 minutes each partner Focus: Timing and technique integration
1. Partner mounts (light resistance) 2. Bottom person chains escapes: trap and roll attempt → elbow-knee → heel drag 3. Reset and repeat 4. Gradually increase partner's resistance
Key detail: Focus on feeling when each escape is available.
---
Variations & Follow-Ups
Variation 1: Knee-to-Elbow from Low Mount
When your opponent sits back in low mount, the knee-to-elbow becomes easier because there's more space between their hips and your shoulders. Focus on getting to your side immediately.
Variation 2: Bridge to Elbow-Knee Combination
Don't commit fully to the trap and roll—use the bridge to off-balance them, and when they post to recover, immediately switch to elbow-knee escape. This combination accounts for athletic opponents who can post out of your bridge.
Common Follow-Up Attacks
If your mount escape puts you in guard:
- Scissor sweep: Use their forward momentum against them
- Hip bump sweep: If they're still off-balance
- Armbar from guard: If they post arms forward to recover
Defense Against Mount (Prevention)
The best mount escape is not getting mounted.
How to Prevent the Mount
- Keep your elbows tight when in bottom side control
- Use frames to create space and prevent the leg from coming over
- When they attempt to mount, bridge and hip escape early
- Half guard is a safety position—don't give it up easily
Early Escape Points
- During transition: The moment their leg starts to cross, bridge and create space
- Quarter mount: When one leg is over but not settled, trap and roll immediately
- Before grapevines: Once they grapevine your legs, escape becomes much harder—don't let them settle
Pro Tips from Experienced Practitioners
> "The mount escape isn't about strength—it's about timing and angles. Wait for them to move, then explode." — John Danaher
Advanced details:
- Against heavier opponents, chain your escapes—trap and roll attempt → elbow-knee → heel drag
- Keep your chin tucked throughout—this prevents collar chokes
- If they post a hand, that's your cue to escape (reduced control points)
- Control their wrist on the side you're escaping—limits their ability to post
Mount Escapes in Competition
High-level competitors rarely stay in mount for long—not because they're immune to it, but because they've drilled escapes thousands of times.
Notable examples:
- Gordon Ryan's mount escapes showcase perfect elbow-knee mechanics
- Marcelo Garcia was known for his explosive trap and rolls
- You lose points when mounted—escape quickly but safely
- In points-based competition, getting to guard is sufficient
- In submission-only, you have more time but mount is still dangerous
Training Recommendations
How often to drill: Include mount escapes in every warm-up. 5-10 minutes of escape drilling 2-3 times per week builds reliable reactions.
Progression path: 1. Week 1-2: Solo drilling (bridges, shrimps) + trap and roll fundamentals 2. Week 3-4: Partner drilling with light resistance + elbow-knee escape 3. Week 5-6: Progressive resistance + escape chaining 4. Ongoing: Live rolling—actively seek bottom mount to practice escapes
---
Frequently Asked Questions
Is the trap and roll effective for self-defense?
Yes, the trap and roll is highly effective for self-defense. In a street situation, being mounted is extremely dangerous (strikes from top). The trap and roll reverses the position quickly without requiring you to stay on your back.
Can beginners learn mount escapes effectively?
Absolutely. Mount escapes are among the first techniques taught because they're essential for survival. Beginners should focus on the trap and roll first, then add elbow-knee escapes as their hip movement improves.
Do mount escapes work in no-gi?
Yes, but grip adjustments are necessary. Instead of grabbing the gi sleeve, overhook their arm for the trap and roll. The elbow-knee escape works nearly identically in no-gi.
What's the difference between trap and roll and upa?
They're the same technique. "Upa" is the Portuguese/Brazilian term, while "trap and roll" is the English description. Both refer to the fundamental mount escape using a bridge and roll.
How long does it take to get good at mount escapes?
With consistent practice (2-3 sessions per week including drilling), most practitioners develop reliable mount escapes within 3-6 months. However, against high-level opponents, you'll continue refining these techniques for years.
What if my opponent is much heavier than me?
Against heavier opponents:
- Don't try to out-muscle them
- Focus on timing (escape during transitions)
- Chain escapes together (first attempt creates space for second)
- Elbow-knee escapes work better than trap and roll against much larger opponents
Summary
Mount escapes are non-negotiable skills in BJJ. Whether you're a fresh white belt or preparing for competition, your ability to escape this dominant position determines how long you survive on the mats.
Start with the trap and roll—it's effective, reliable, and teaches fundamental bridging mechanics. Once comfortable, add the elbow-knee escape for situations where the trap and roll isn't available. Finally, learn to chain these escapes together against skilled training partners.
Remember: The best practitioners aren't those who never get mounted—they're the ones who escape mount so efficiently that opponents stop trying.
---
Related Techniques:
- How to Escape Side Control
- Guard Retention Fundamentals
- Half Guard Recovery and Sweeps
- Best BJJ Gis for Daily Training
- Knee Pads for Ground Work
Have questions about mount escapes? Drop a comment below—we love helping fellow practitioners level up their game!